photo home_zps38eefb72.png  photo aboutme_zpsd52aac8f.png  photo mystore_zps39a49aca.png  photo privacypolicy_1.jpg

October 2, 2015

Happy Fall Ya'll!

Happy fall ya'll!  October is here, and finally I am too :).  This past year has been super tough, so I have not been bloggin' at all.  Unfortunately, my mom passed away March 7th and it really hit me hard.  Although it has been almost 7 months, it is something that I struggle with every day.  I'm lucky to have such wonderful family and friends to support me.  I would appreciate all of your prayers and positive thoughts sent my way.  It's not only tough on me, but it's tough on my 4 year old daughter who was super close to her as well.

I did not want to start this blog off on a sad note, but wanted everyone to know why I have been missing for a while.  School wise, my year has been off to a mostly smooth start.  Super busy, but smooth.  I hope your year was off to a great start!  I love, love, loooove October and the fall season.  From pumpkin picking, pumpkin flavored everything, and just fall scents and colors, it is truly one of my favorite times of the year.  As soon as October rolled around, I did not hesitate to bring out the festivities in my classroom. :)

This week, we have been working on base ten and 2 digit numbers with my 1st grade group.  We practiced with base ten blocks and place value mats, but I wanted to change it up a bit and make it fun.  I decided to break out my Chutes and Ladders game, but added a twist to supplement our learning with base ten.

Before our game, we warmed up by practicing identifying double digit numbers with flashcards.  We practiced counting by both ones and tens.  Then, we were ready to play!


The students took turns spinning their spinner, just like how you would normally play.  When they took their turn, they moved as many spaces as the spinner showed them.  After moving their pawns, they had to say the number that they landed on.  Then, they used the tens and ones to build that number.  During each turn, the students had to tell me how many ones and how many tens were in their number.   During each turn, I would talk them through it asking them questions, "Do you have to add more ones or tens?" "Who has the biggest number?"  "Who has the smallest number?"  "How many tens are in ____'s number?"


My kiddos had a blast playing this game.  They got really into it, and it helped them make the connection about how many tens they had and how big their number was.  After our game, I made a couple random numbers using base ten blocks.  The students told me each number.  Then I had them give me a quick thumbs up for the higher number and thumbs down for a lower number.  

Soooo, before I said that I did not hesitate to start Halloween crafts, so here we go!  I have 3 different math groups.  I have a K-1 group, a 2nd grade group, and a 4th grade group.  I originally thought of this idea for my oldest group when we were reviewing multiplication and arrays.  We made spiders and pumpkins arrays and ten frames with our bingo dotters!

We used:
- Bingo dotters (black and orange)
- Purple construction paper
-Pens/markers
- Hundreds chart (blank)

First, my students decided on the factors they wanted to use for their array.  Then, they started dabbing away!


We cut the extras away from the hundreds chart, and then glued it onto the purple construction paper.  Then, they wrote their equation on the side.  Then, they got to decorate it by adding stems for pumpkins and legs for spiders!

For my younger students, we used 10 frames instead. 

My 2nd grade group was working on adding numbers to a set of ten to make numbers in the teens.  We dotted a set of ten, and then in a separate ten frame, they picked any number to make.  Then they decorated and turned them into spiders and pumpkins.  Afterwards, we glued our ten frames to the construction paper and wrote down the equation on top.  

 We also did this with my K/1 group.  We made ten with spiders and pumpkins.  I loved how I was able to differentiate, so all my students could have fun with it!


Here is our wall we hung them up on!  The clarity from the camera isn't the best, but it's what I have to work with right now.  I don't have any luck with phones, and ended up breaking my phone.  Now I am stuck using an old phone, but I am planning on sucking it up and paying the money for a new one, since insurance doesn't cover water damage.  


I cannot WAIT to post about our next activity we worked on.  We made something icky and sticky and my kids had a BLAST with it!!  I will post it this weekend.  :)

I hope you all had a wonderful week and enjoy this weekend!  A WET one if you are on the coast and being affected by Joaquin!  (Stay safe if you are!!)

Ciao!


February 1, 2015

Snowball Sight Words with Snow Dough!

 
As I finish up cleaning my house this Super Bowl Sunday, this is how I'm feeling! :)
Before we head out to a party, I wanted to post a fun activity I have planned for this week.  There's been so many times that I pinned things on Pinterest that are amazing ideas, but I just never get around to them.  I could not pass this one up though...as soon as I saw it, I knew my sweet students would LOVE it! 

 Three Ingredient Snow Dough - This stuff is really fun to mold and squish!
 
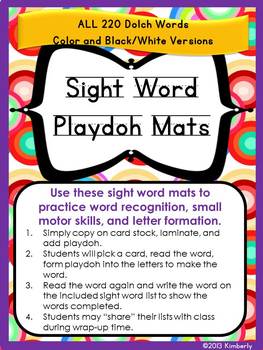
Yesterday, I got to work making it.  I am planning on using this fun dough as a way to practice sight words.  I found some awesome play-doh sight word mats on TPT.  Click on the pic below to get them too.  They were $4 for all 220 sight words.
 
Sight Word Playdoh Work Mats 220 Dolch Words  (Black/White
 
I printed out the black and white sight word mats, and then put everything in a plastic container.  Then I put the sight word cards in a plastic baggy.  If you use a clear container, you can even put them underneath.  The students will make "snowballs" to make their sight words.  I can't wait to use these!
 
 
The students will just roll the dough into little snowballs and cover the word with them.  I will be posting more fun winter activities soon, but I am heading out to a party now.  Have a wonderful week!!
 
Hope you enjoy!
 
Ciao!


November 23, 2014

It's almost turkey time...gobble till ya wobble! (And a freebie!!)

Hello everyone!  It is almost turkey time!  I'm so excited to spend time with family (and for a short break!).  I love this time of year - the different scents, food, and being able to wear comfy sweaters and boots. 
 
Speaking of fall foods, I've been working hard to stay away from a lot of processed foods and have recently tried coconut flour to bake.  I found a recipe for paleo pumpkin muffins, so I made those tonight. 

My little helper :)
 
They came out sooo yummy!  There are the best right out of the oven when they are warm and moist, but I'm going to store what we don't eat tonight into a container and put them in the fridge.  This way I have a healthy snack I can bring to work, or send to school with Bella. 
 
They didn't come out looking the prettiest, but they are delicious!  Even my picky 3 year old loves them!
 
I found the recipe on pinterest.  If you're interested in the recipe, here's a direct link to The Detoxinista
 
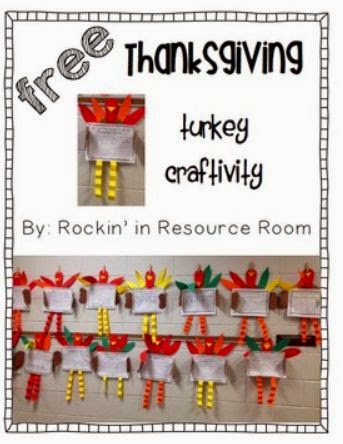
Another thing I LOVE about fall is all the adorable craft ideas to do with my students.  This past week, we made turkeys to hold our hard work!  I have been really focusing on writing with my kiddos this year.  Since I'm a K-3 resource teacher, my students are all on completely different levels.  I created different writing prompts (and blank templates) to fit the needs of all my students.  For my kindergarteners, they just finished the sentence (they told me what they wanted to write and I wrote it on the table as a model for them to copy).  My first and second graders had to answer the prompt in 1-2 sentences.  My third graders had to answer the prompt with a paragraph.  I was so proud of how well my students did with coming up with their own complete sentences.  They loved displaying their hard work in the hallway with these turkeys, but they are very excited to take them home on Tuesday (we are off Wed, Thurs, and Fri!!)   
 
A lot of my kiddos liked to write about what they were thankful for and what they liked to do on Thanksgiving.  Those were the biggest hits on the writing prompts.  Well, I am THANKFUL for my followers on my blog and TPT store, my students, and hard working teachers!
 
My gift for you fellow teachers is this packet (turkey templates and writing prompts) for FREE.     Just click on the picture. :)
 
http://www.teacherspayteachers.com/Product/FREE-Thanksgiving-Turkey-Writing-Craftivity-1570148
If you download it, please let me know what you think!
 
I hope you all have an amazing Thanksgiving and enjoy time with your family!
 
Ciao!


November 19, 2014

Chalkboard Boxes

Hi everyone!!  I am finally back!  It has been a crazy busy school year so far.  My goal was to begin blogging again MUCH sooner, but I just have not gotten around to it.  I have been dealing with some pain that at first I thought was carpal tunnel, but after many tests, an ER visit, and many doctor appointments (and an MRI to rule out brain tumor and MS), I am in the process of getting diagnosed with fibromyalgia.  I have an appointment on December 12, so maybe I will finally find out what is going on with me!!
 
 Back in August (I know, I know - I am waaayyyy late), I was in the playroom with my little girl Bella and we were practicing writing letters on her chalkboard wall.  I was looking for some ideas on Pinterest and found a great idea to write the word in chalk, and then have the child use a paint brush and water to trace over it.  I really liked that idea (and so did Bella!), so I was thinking about ways I can use that with my students.  I wanted to think of a way we can do something like this without taking up too much transition time, since I only have 45 minutes with them in my classroom to work on their IEP goals.  After thinking for a couple minutes, a light bulb went off in my head...Chalkboard BOXES!  I use them to practice letter writing, as well as sight words with students that have already mastered letter writing/formation.  Here is what they look like:


Bella and I went to the local dollar store and we picked up these:
 
*Plastic storage containers
*1 box of sidewalk chalk (24 pack)
*2 Microfiber towels
*Little paint brushes (like the kind used for watercolor paints)
 
Then we went to Walmart and picked up chalkboard spray paint.  We also needed to get a spray primer for the plastic lids.  I bought little plastic "party" (shot) cups as well.  Then  I got to work!

I FIRST sprayed the primer (it's a must!) onto the lids.  Then I sprayed the chalkboard paint. 
 
I let them dry for the rest of the day in my garage, so the paint could settle.
 
Once they were all dried and ready to go, I assembled them.


I put 4 crayons in each of the 6 boxes.  Then I put the paint brush and cup.  Then I cut the 2 microfiber towels into 3 pieces each and put one in each box.
 
In the classroom I use these mostly with sight word practice.  I introduce the sight word.  We read it together.  Then they use their fingers to trace it in the air (we call it air pencils), and saying each letter out loud while they do it.  Then they write it on the lid of the chalk board box.  Once they write the word, they trace over it with the water in the cup and the paint brush.  Then we continue with our other activities.  The board wipes pretty clean, especially when you use water on the eraser.  My kiddos LOVE these!
 

For younger students, you can write the letter or word (or even their names!) on the boards for them a bunch of times, and they can practice it by tracing it with the paint brush and water.
 
We also use these with our spelling word lists.
 
Let me know some ways you will use these boxes in your classroom!
 
 Well I hope you are all having an amazing fall.  I can't believe next week is Thanksgiving!  I am going to post a freebie tomorrow for a Thanksgiving craft, so be sure to check it out!
 
Ciao!


May 4, 2014

Liebster Award and a Freebie

 Hello there!  Hope everyone has had a wonderful start to spring!  I haven't gotten a chance to post about spring break, so I'm going to start with that.  Then we will get into the Liebster Award and lastly, a freebie.  Hang tight, it's going to be a long one.

I've had a great week off spending time with my little one.  I found this awesome recipe on Pinterest for homemade fruit roll ups.  It's made from just 3 ingredients...strawberries, lemon juice, and the sweetener of your choice (we used organic Stevia!).  They came out fantastic...Bella LOVED them and they are soooo much better for you than the store-bought packaged ones.

First, we washed and blended strawberries in our food processor.  Then we added a tablespoon of lemon juice, and an equivalent to 3 tablespoons of Stevia.  Next, we put the mixture into a pot and heated it on med-high heat for about 10 mins.  Bella was so proud that she got to stir it!


After about 10 minutes, we spread the mixture on a sheet of parchment paper.  We baked it on 170 for 3 hours.  The final product was delicious!  Click here for the recipe, and for the blog where we found it!
We also got to enjoy our fire pit for the first time this year.  We've been so crazy busy and the weather has been so chilly lately.  It's finally been nice enough to enjoy it.
Ok, so let's get on to the Leibster award.  So, basically it's an awesome way to gain some followers of your blog and find some really great blogs that you can follow as well.  You also get the opportunity to learn about 5 wonderful teachers too!  Hang on, it's gonna be a long ride, but it's worth it! :)


Thanks you to A New Box of Crayons for nominating me!

http://anewboxofcrayons.blogspot.com/
Step 1: Answer the 11 Questions Your Nominating Blogger Provides
1. Who was your favorite teacher?  How have they influenced you today?
I would have to say my favorite teacher was my first grade teacher.  My family and I moved to a new town the summer going into first grade.  I started the year in a new school, and was very nervous about it.  My teacher made me feel welcomed and helped encourage new friendships.  Now, I always try to create a comfortable environment in my classroom where all my students feel welcomed and important, just how my teacher did for me.
2. What is the best part of your teaching day?
I would have to say just whenever I have my students!  As a resource teacher, I teach reading and math all day to different groups.  Luckily, I do get a planning time and a lunch time.  Since I'm in charge of IEPs, special ed paperwork, my favorite time is any time I teach and not have to do paper work! :)
3. What is your funniest school memory?
Hmmmm, I'm sure there were a lot of fun times I had, but I'm having a hard time thinking of some worthy of writing about.  It wasn't funny then, but I remember one time in gym class we were playing a game.  Another girl and I (being my clumsy self) collided into each other.  somehow my tooth hit her head and she started bleeding a little.  I walked her to the nurse, and I ended up needing the nurse myself.  I remember feeling very woosie (spelling?) and the next thing I know, the nurse was holding those smelling salt strips by my nose.  I'm not sure why I felt like that, but it was probably from seeing the other girl's blood.  To this day, I still get woosie and will pass out from blood.  I look back and now it's kind of funny, but it sure wasn't then!
4. What are your hobbies, or how do you unwind after working all week?
Aside from spending time with my hubby and daughter, I love to do Zumba and workout.  I try and go at least 5 days a week.  The place where I go does other classes as well, so I like to do a mixture of zumba, zumba interval training, and a butts and guts class they have.  I feel wonderful after working out!  Hubby and I love movies, so we like to just chill and watch a movie too.
5. How do you spend your summers?
The last 2 summers I either tutored or did compensatory services for a couple students a few hours a week.  Aside from that, I enjoy my time being a stay at home mom.  When Bella is in bed, I work on some things for my blog and sprucing up some of my classroom lessons to put on TPT.  I haven't made my decision if I'm going to be tutoring this summer yet or not.  We shall see!
6. What is your favorite dessert?
Mmm, I'm getting hungry thinking about it.  I would have to say anything peanut butter and chocolate!
7. What new instructional practice have you found success with?
I would have to say Learning Centered Teaching.  We had training on it this year, and it has helped me to become a better teacher.  I learned to let the students take more control over their learning.  Instead of showing how to get an answer, they would try to find their own ways to get it.  I do explicitly teach skills, but students also are in charge and make some choices on their own and collaborate with others.

8. Do you love and use technology in the classroom, or are you sometimes intimidated or frustrated by it?

Haha, kind of both.  I love it and use it a lot, but it does often frustrate me when things down work out the way we want them to, hehe.  I loved using the iPad for many things, and I use my document camera every day.  I am lucky enough to have a Smart board (probably just for this school year though), so I love using that as well.

9.  What is your favorite children's book?

I have a lot that I just love, but some of my favorites are all the Strega Nona books by Tomie dePaola.  .  They teach good lessons, and they are hysterical!

10. What is the most exotic place that you have traveled to?

For our honeymoon, hubby and I went to Ochos Rios, Jamaica.  We have never been anywhere tropical like that (except Florida), and the only other time I left the country was to go to Canada when I was younger.  We stayed at Sandals, and it was all inclusive. We loved Jamaica!   It was absolutely beautiful, and we had an amazing time.  We are hoping to go back one day!

11. Do you have pets?  If so, what kind?

We have a kitty, who just turned 1.  His name is Rocky, and the name fits him!  He is one feisty little cat!  We would have had 2 (a female named Adrian - just like the Rocky movies, hehe), but unfortunately she was sick and passed away when she was about 2 months old.  I find this strange, because in the movie, Adrian passed away as well.  What a weird (and sad) coincidence!!  Pete wants to get a pet dog, but I am not ready for another pet, especially a dog.  I love dogs, and grew up with one, but they can be pricey, because of vet expenses and everything.  Plus with our busy schedules, I feel like I couldn't give him/her the right amount of attention.   Maybe one day! :)


Step 2: Here are 11 Random Facts About Me

1.  I am originally from Long Island, New York and moved to North Carolina almost 4 years ago.
2. I married my high school sweetheart. <3
3. My daughter, husband, and I (kind of) born on holidays.  My daughter was born on 4th of July, hubby was born on Valentine's Day, and I was born the day before Halloween (which I looked up and it's known as Mischief Night or Devil's Night - creepy!!).  I guess when we try for our next baby, we should aim for around a holiday? hehe
4. My favorite color is purple.
5. I have 2 older brothers.  One is 15 years older, and the other is 17 years older.
6. I became an aunt at 4 1/2 years old.
7. I use my hands to talk a lot.  At my bridal shower, I was talking and my hands were going, and I accidentally knocked into someone and their food plate went all over the floor!
8. I'm quite clumsy (see above)!
9. I LOVE the beach (but somehow moved 4 hours away from the coast!), but I guess this makes for some good vacations.
10.  I love Zumba and working out.
11. I got my black belt in karate when I was 12.


Step 3: Present the Liebster Award to 5 New Bloggers with Less than 200 Followers

Here are 5 blogs that I think are awesome!  Go ahead and check them out for yourself!


loveandteachon.blogspot.com


teachertrap.com


myfabulousclass.blogspot.com


mswuteach.blogspot.com

Now, here are your 11 questions:

1. Who/what inspired you to be a teacher?
2.  What is your favorite vacation spot?
3.  What do you love to do outside of teaching?
4. Do you have any pets? If so, what kind?
5. What is your all-time favorite movie?
6. What advice would you give to a new teacher?
7. What is your favorite quick "go-to" meal on a busy weekday?
8. What is your favorite children's book?  Why?
9. If you weren't a teacher, what other career do you think you would have?
10. What is your favorite quote?
11. How do you plan on spending your summer this year?

Thanks for stickin' around through all of that.  It's been a long post!  Now for the freebie...

www.teacherspayteachers.com/Product/Roll-and-Graph-Freebie-1223290


Click on the picture to download it for free!  I love to use this in a small group, or even individually.  My kiddos love playing this.  When they play it in a small group, they like to see who can fill up a column first.  If you like my freebie, you can also purchase the full sight word packs in my TPT store!

I hope you have a wonderful week!

Ciao!


April 19, 2014

10 Awesome Apps for the Primary Grades!

1. Letter School
 
 
This app is a wonderful way for young students and kinesthetic learners to practice letter names, sounds, and writing!  Students can select a letter, or even a number, and it plays a brief  "song" introducing the letter and the sound it makes.  Then it shows a graphic with that beginning sound.  If you click on the number, it says what number it is.  Then it shows that amount of a certain graphic.  This app gives the opportunity to trace each letter or number.  Each one has something different.  For example, you can trace it with your finger, and it shows railroad tracks as you trace it.  When you're done tracing it, a train will appear going in the same direction as how you traced it.  It also has many other things such as grass, flowers, lights, and much more!  This app shows the correct way to form letters and numbers, and even gives the opportunity to practice without a model.  You can download the free version which gives you access to numbers 1-5 and letters a-e.  If you pay $2.99, you get all letters a-z (upper and lowercase), and numbers 1-10!  It is definitely worth the money if you have young students that need practice in this area!
 
 
2. Patterns (EdNinja)
 
 
This completely FREE app is the perfect way to practice patterns!  They start out easy, and they increase in difficulty.  I LOVE the fact that you can create an account for each student.  You can even take a pic of your students, and it shows up on the home screen.  They just tap their picture and it signs them in.  All their progress is saved. 
 
 
3. SparkleFish
 
 
This FREE app is a fun way for students to practice parts of speech.  It's basically like a MAD LIBS app, except you speak into the iPad and it puts it into a story.  The students can select a topic for the story.  Then it asks you to say a noun, verb, adjective, etc.  It plugs the students' responses into the story.  My students love hearing their own voice on there. 
 
 
4. Chatter Pix


This is another great freebie app where students can record their voices.  Students can select a pic from the gallery or take their own.  Then they create a "mouth" on the object and can record their own voice.  You can save the videos when they are done.  This is a great way to practice oral story telling.  You can also use this app in the classroom by taking your own pictures and recording your own voice.  Students can provide a written response to what you've said or asked, or they can even write a continuation of the story you recorded.  You can even just have them write down what you said to build on writing skills.  There are so many possibilities with this app!
 
 
5. Sight Words
 
 
This app helps your students learn the sight words from the preprimer - 3rd grade sight word lists!  It's like a flash card, where it shows the word on the screen.  The students can tap the screen and it says the word, so students can see how it is pronounced or to check if they say it correctly.  You
 even have the option of turning the sound off, if you don't want your students to use that feature.  You also have the option of changing the font and colors, and you can also create specific lists for individual students!  This is also a FREE app. :)
 
 
6. Whole Wide World
 
 
This fun app is a great way for your students to explore the world!  Students can tap any of the countries listed, and learn about different facts from that part of the world!  The students must earn stamps (and even a postcard) to learn new information about a country.  They can do this by playing the games.  The games do have items in it that represent that specific country, so they do help with recognizing different objects/animals/people they will see in those countries.  This app is great for a 5 minute mini lesson before or after a class to help teach global awareness.  I like to have my students play this for about 5 minutes (enough time for them to beat a level and learn a new fact).  Check it out and see how you can use it in your class!
 
7. Bugsy K Learn
 
 
This adorable FREE app lets students practice letter recognition, letter sounds, beginning/middle/ending sounds, and word recognition!  The space theme is fun, and after completed 4 activities (4 stars), the students can earn a "toy".  The toy gets placed in the app's home screen (Bugsy on the moon with a rocket ship).  They can "play" with the toys by poking them, and they do a little trick.  My students LOVE earning new toys.
 
 
8. Splash Math
 
 
Splash Math has different apps for each grade level K-5.  Students can have their own login.  There is a free version and a paid version.  The free version limits you to 20 questions per day.  We use the free version; I haven't paid for the full version.  This app is engaging and uses lots of visuals!
 
 
9. Chicktionary
 
 
This fun app allows your students to make words using the letters provided.  It's a great way to practice phonics and word building.  The app is free, but once you complete a level, you need to pay for additional levels.  This is another favorite of my students!
 
 
10. Gazzili
 
 
Gazzili has all different apps.  You can download a free version of Gazzili Words, which teaches
about finger prints, balance, and rainbows.  You can buy additional categories for $0.99.  That app is good for pre-k and k, but there is also a math app, shapes, puzzles, and science.  They are different prices, but they are very engaging.  They are colorful and perfect for very low or very young students!
 
 
Some other great apps we use are Paint Sparkles, HookedPhonics, ABC Mouse (free letter music videos), Literacy! (Learn with Boing), Hungry Fish, Math!, Addition!, Shapes, Sorting 3, WH Questions, and Play 123.
 
One more app I want to tell you about (if you don't know it already) is the Common Core app.  It's soooo helpful when lesson planning.  This app gives easy access to all the common core standards at your fingertips, instead of flipping through pages of hard copies.  You just click on the subject area and grade level and it all the standards come up.
 
Hope you enjoy these apps as much as my kiddos do!  What are some of your favorite apps to use?
 
Ciao!


February 23, 2014

10 EASY (and fun) Ways to Practice Blending and Segmenting for Kinesthetic Learning!

Blending and segmenting sounds are an important part of learning to read.  These two things can be hard for young kiddos to learn, especially if they have a type of learning disability or special need!   As a resource room teacher, my students' needs all vary.  I'm always trying to find new ways to teach using a multi-sensory approach!  Here are 10 ways I teach blending and segmenting in my classroom:

1. Slinky Stretch

When we build words with our magnetic letters, we use slinkies to sound out our words.  I give students the word, use it in a sentence, then my kiddos repeat it.  Before they build the word with magnet letters, they grab their slinkies, and sound out the word by stretching the slinky.  You can pick up a pack of 2 slinkies at Dollar Tree for $1, and they come in fun colors!


2. Word Walk

Young students need to get up and moving!  This activity gets students using larger muscles to practice blending sounds together.  I put construction paper with a letter on each piece on the floor.  I pick out certain letters that we will be using.  For example if we are doing the -un word family I will have the letters u, n, b, r, and s on the floor.  I'll have the first word ready on the floor.  The student(s) will walk the word, saying each sound as they walk.  Then they tell me what the word is.  When we move on to the next word, I tell them to change the first sound to another (Ex. "Change the /r/ to a /s/).  Once they change it out, they walk it again, saying each sound as they step on it.  Then they tell me what the word is.  A variation of this activity is "Hula Hop".  Lay hula hoops in a row and have students jump in one hula hoop for each sound.  


3. Tap Lights

Another fun way to practice either blending or segmenting is tap lights!  I also got these at Dollar Tree for $1 each.  Students can use them to sound out the words by tapping each light and saying the sound.  Then they say the whole word.  They can also practice segmenting by listening to a word the teacher says, then tapping a light for each sound they hear.  As they tap the light, they say the sound.  I use it both ways.  If you have a bunch of students and can't buy a lot of lights, you can have students sit in a row with a light in front of each of them.  You can call out a word and then each student will tap their light and say a sound.  For example, for the word "stamp", one student will tap a light and say /s/, the student sitting next to him/her will tap their light and say /s/, and so on.  (Don't mind my student eating snack in the picture while doing this haha)


4. Blending Ball

In small groups, give students a word.  The students will pass or roll the ball to one another, and say the next sound in the word as they catch it. For example, the teacher gives the word "dot".  The teacher rolls or tosses a ball to the first student, who says /d/.  That student passes it to the next one who says /o/, and so on.  You can use any type of ball.  I like to switch it up each week.  We usually use a beach ball, ping pong balls, and tennis balls. 


5. Texture Time

One fun way to practice blending sounds is to sound out words is with a textured surface.  You can use foam, magnetic letters, etc. for the word.  Then, students can slide their finger in some kind of texture in a tin, such as flour or shaving cream.  As students sound out the word, they slide their finger in the texture saying each sound.  In the picture, I used flour.


6. Blast Off!

My kiddos LOVE this fun way to practice blending and segmenting.  To blend sounds together to decode a word, have students squat down.  Next, they say the sounds in the word.  Have the students jump up in the air and say the whole word.  This can also be used to segment sounds.  You would say the word out loud in a small group.  Have a group of 3-4 students (depending on the words) and line them up in a row.  Each student will squat down and say one sound.  Once everyone says a sound in the word, they will all jump up at the same time and say the whole word.  For example, if you have the word "big", one student will squat down and say /b/, the next would squat and say /i/, and the last student would squat and say /g/.  Then everyone would jump up and shout "big!".  (I apologize for no pics - we aren't allowed to post any pics of students).


7. Head, Shoulders, Knees, and Toes

This activity is another way to use your large muscle group to sound out or segment words.  For blending sounds, the students will simply touch their head for the first sound, their shoulders for the second, their knees for the third, and their toes for the fourth sound.  Have them start out slow, then they can blend the sounds faster and faster until the say the whole word.  For segmenting, give students the word, and they will say each sound touching their heads, shoulders, knees, and toes.

8. Tap and Slide

This is similar to texture time, except your students can use a textured object to slide their finger under the word.  Have students build the word by giving them the sounds.  After the word is built, have them slide their finger underneath the word on a textured surface or object as they blend the sounds together.  You can use felt, sandpaper, rope, carpet squares, etc.  In this picture, I was using rope.


9.  Bead Slide

Using a pipe cleaner and beads, have your students slide the beads along the pipe cleaner to sound out words.  They can start out slow, then move them quicker.  To segment sounds, give students a word and have them say each sound in the word as they slide a bead.


10.  Elkonin Boxes

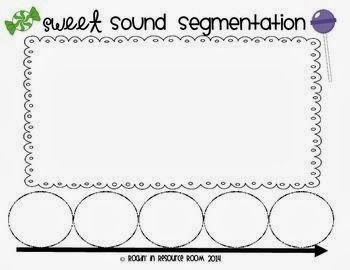
I love to use these with my students and create different ones to go with different holidays and times of the year.  I call it "Sweet Sound Segmentation".  I say a word, then the students slide a candy into each box to represent a sound.  I use different types of candies with it.  For Christmas, I used peppermint swirls, for Valentine's Day I used candy hearts, etc.  Download a general template here for free!  It also comes with directions and a recording sheet.


Hope you enjoy using these fun ways to practice blending and segmenting sounds.  I would love to hear some of your ideas as well!

Ciao!